Overview
Experiments allow you to test your LLM changes (prompts, models, etc.) in multiple stages until you have the data to help you feel confident about your changes.1
Backtest
Backtesting allows you to safely test your changes on historical data. You’ll be able to see
a comparison on how your change affected the latency and LLM score. This can be the first step
before testing on live users.
2
A/B Test
A/B Tests enable you to test your changes on live requests and users. You can configure the
A/B Test with multiple variants (prompts), and decide how to split traffic between them. You’ll
be able to see data on how the variants are performing live, and see which requests are being
routed where.
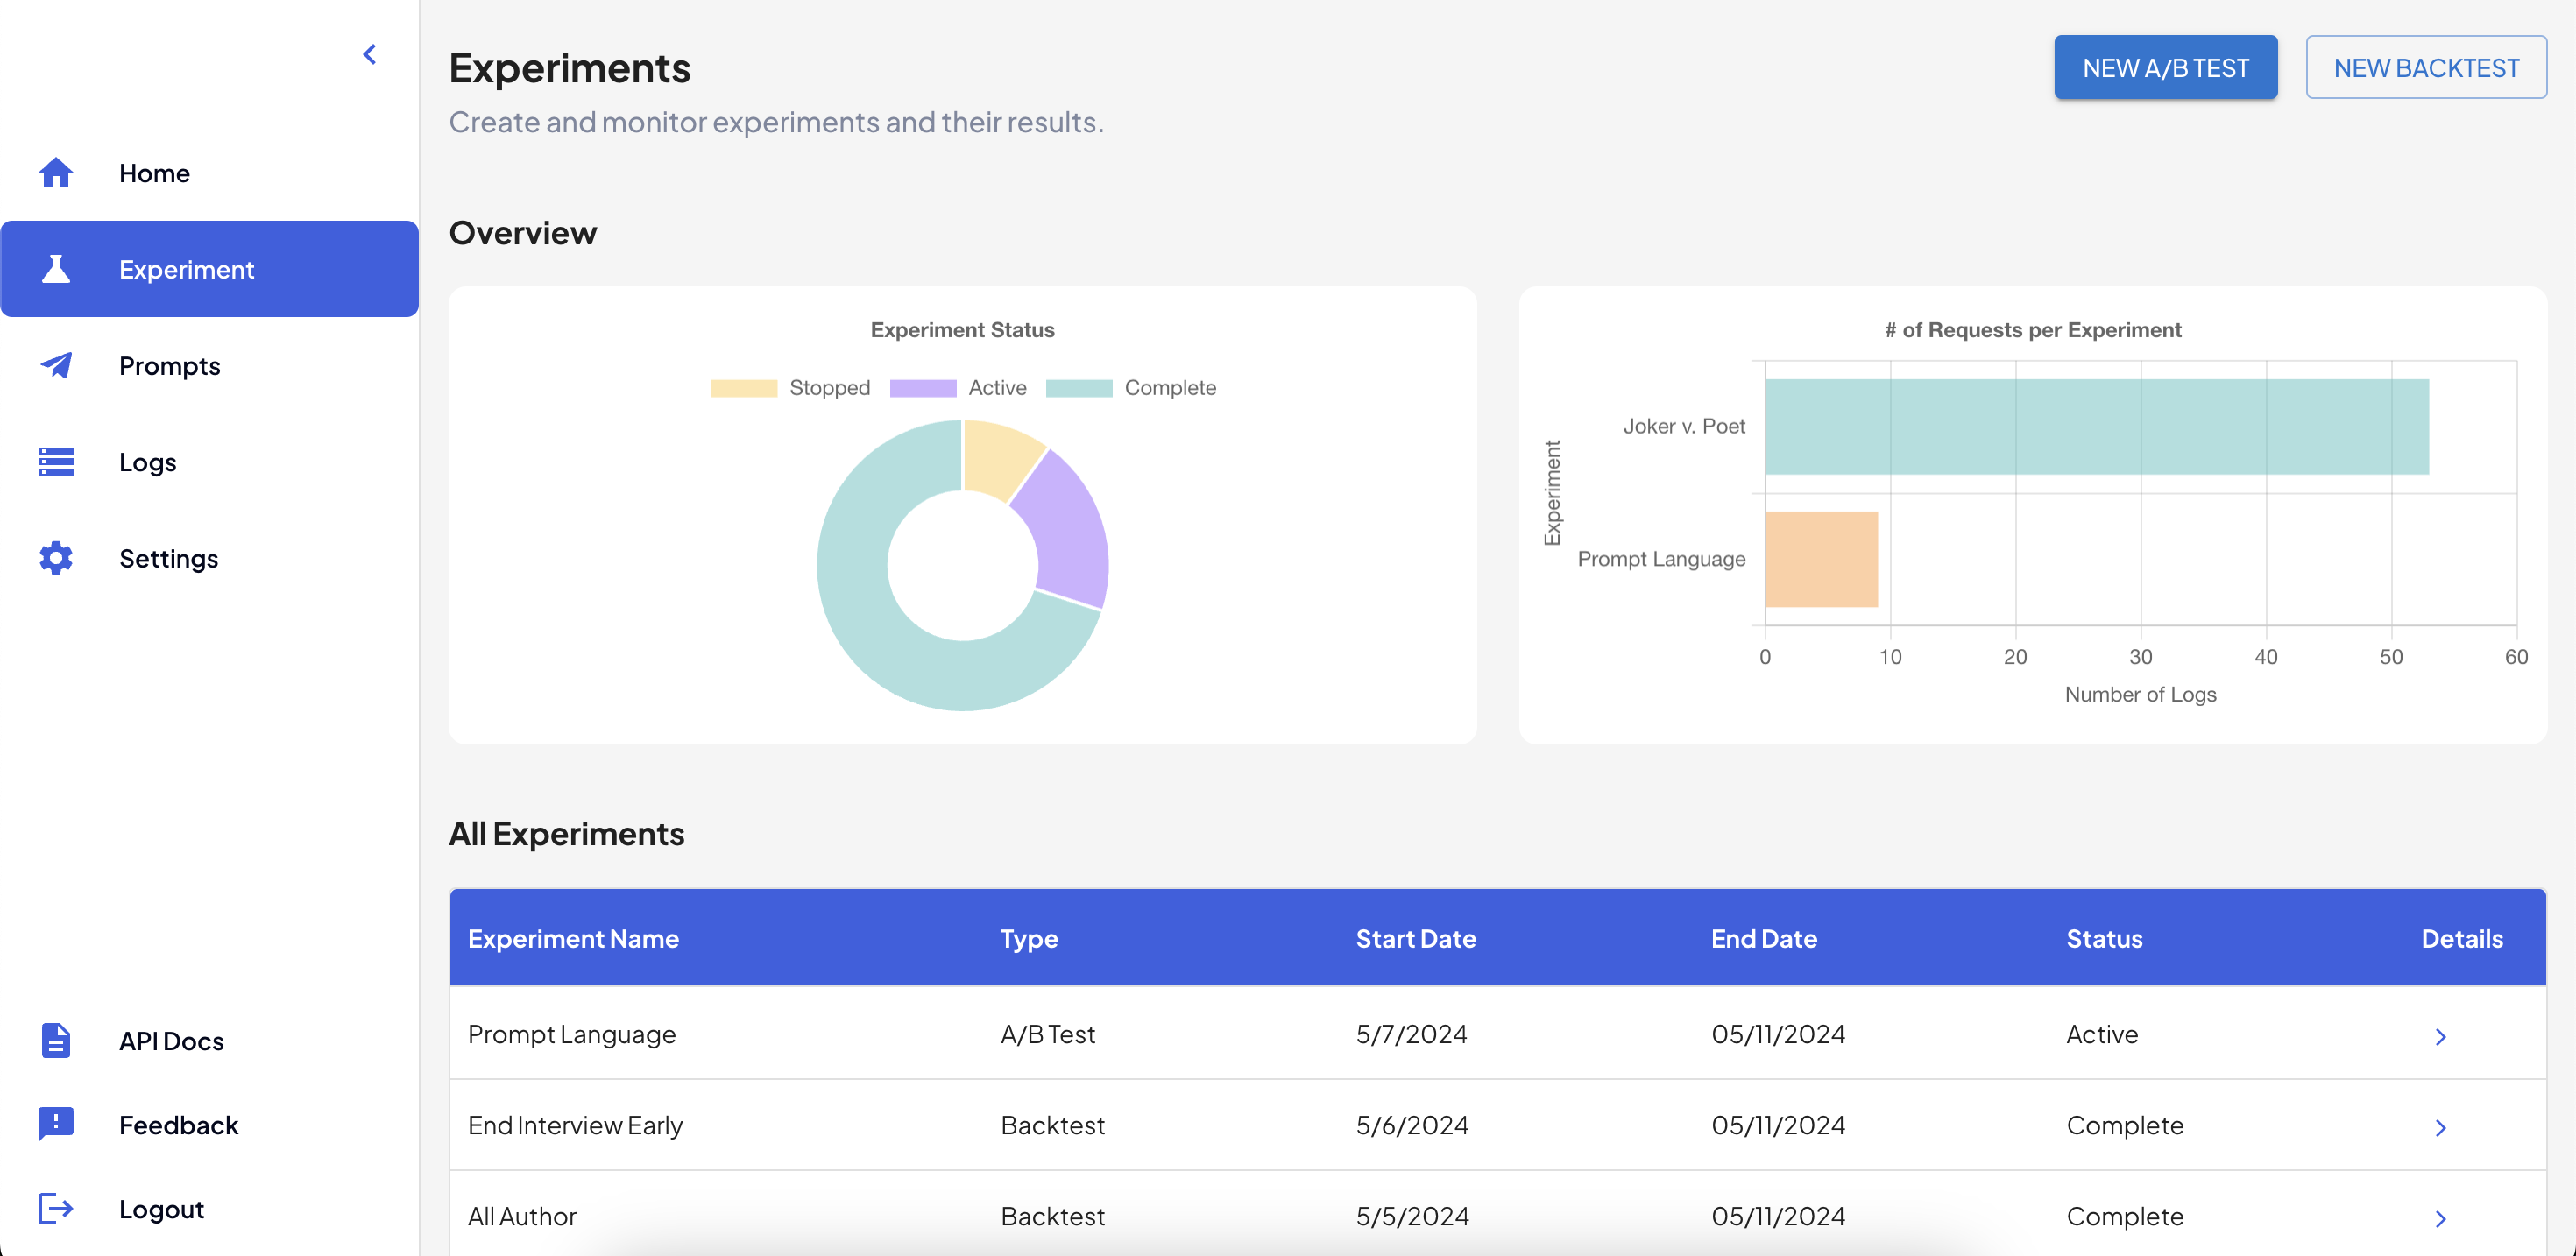
Experiment Overview Page
Backtests
Create a new Backtest
Get started by heading to the Experiments page, and clicking on the “New Backtest” button. On the Backtest creation page:- Name your backtest. This is for your future reference.
- Select the data. Choose which historical requests you want to re-run with your new prompt. You can filter these by date.
- Choose the new prompt to test. Your prompt/model configurations will be shown in the dropdown list.
Select one, or create a new prompt using the
+button next to the list. - Hit the “Run Backtest” button!
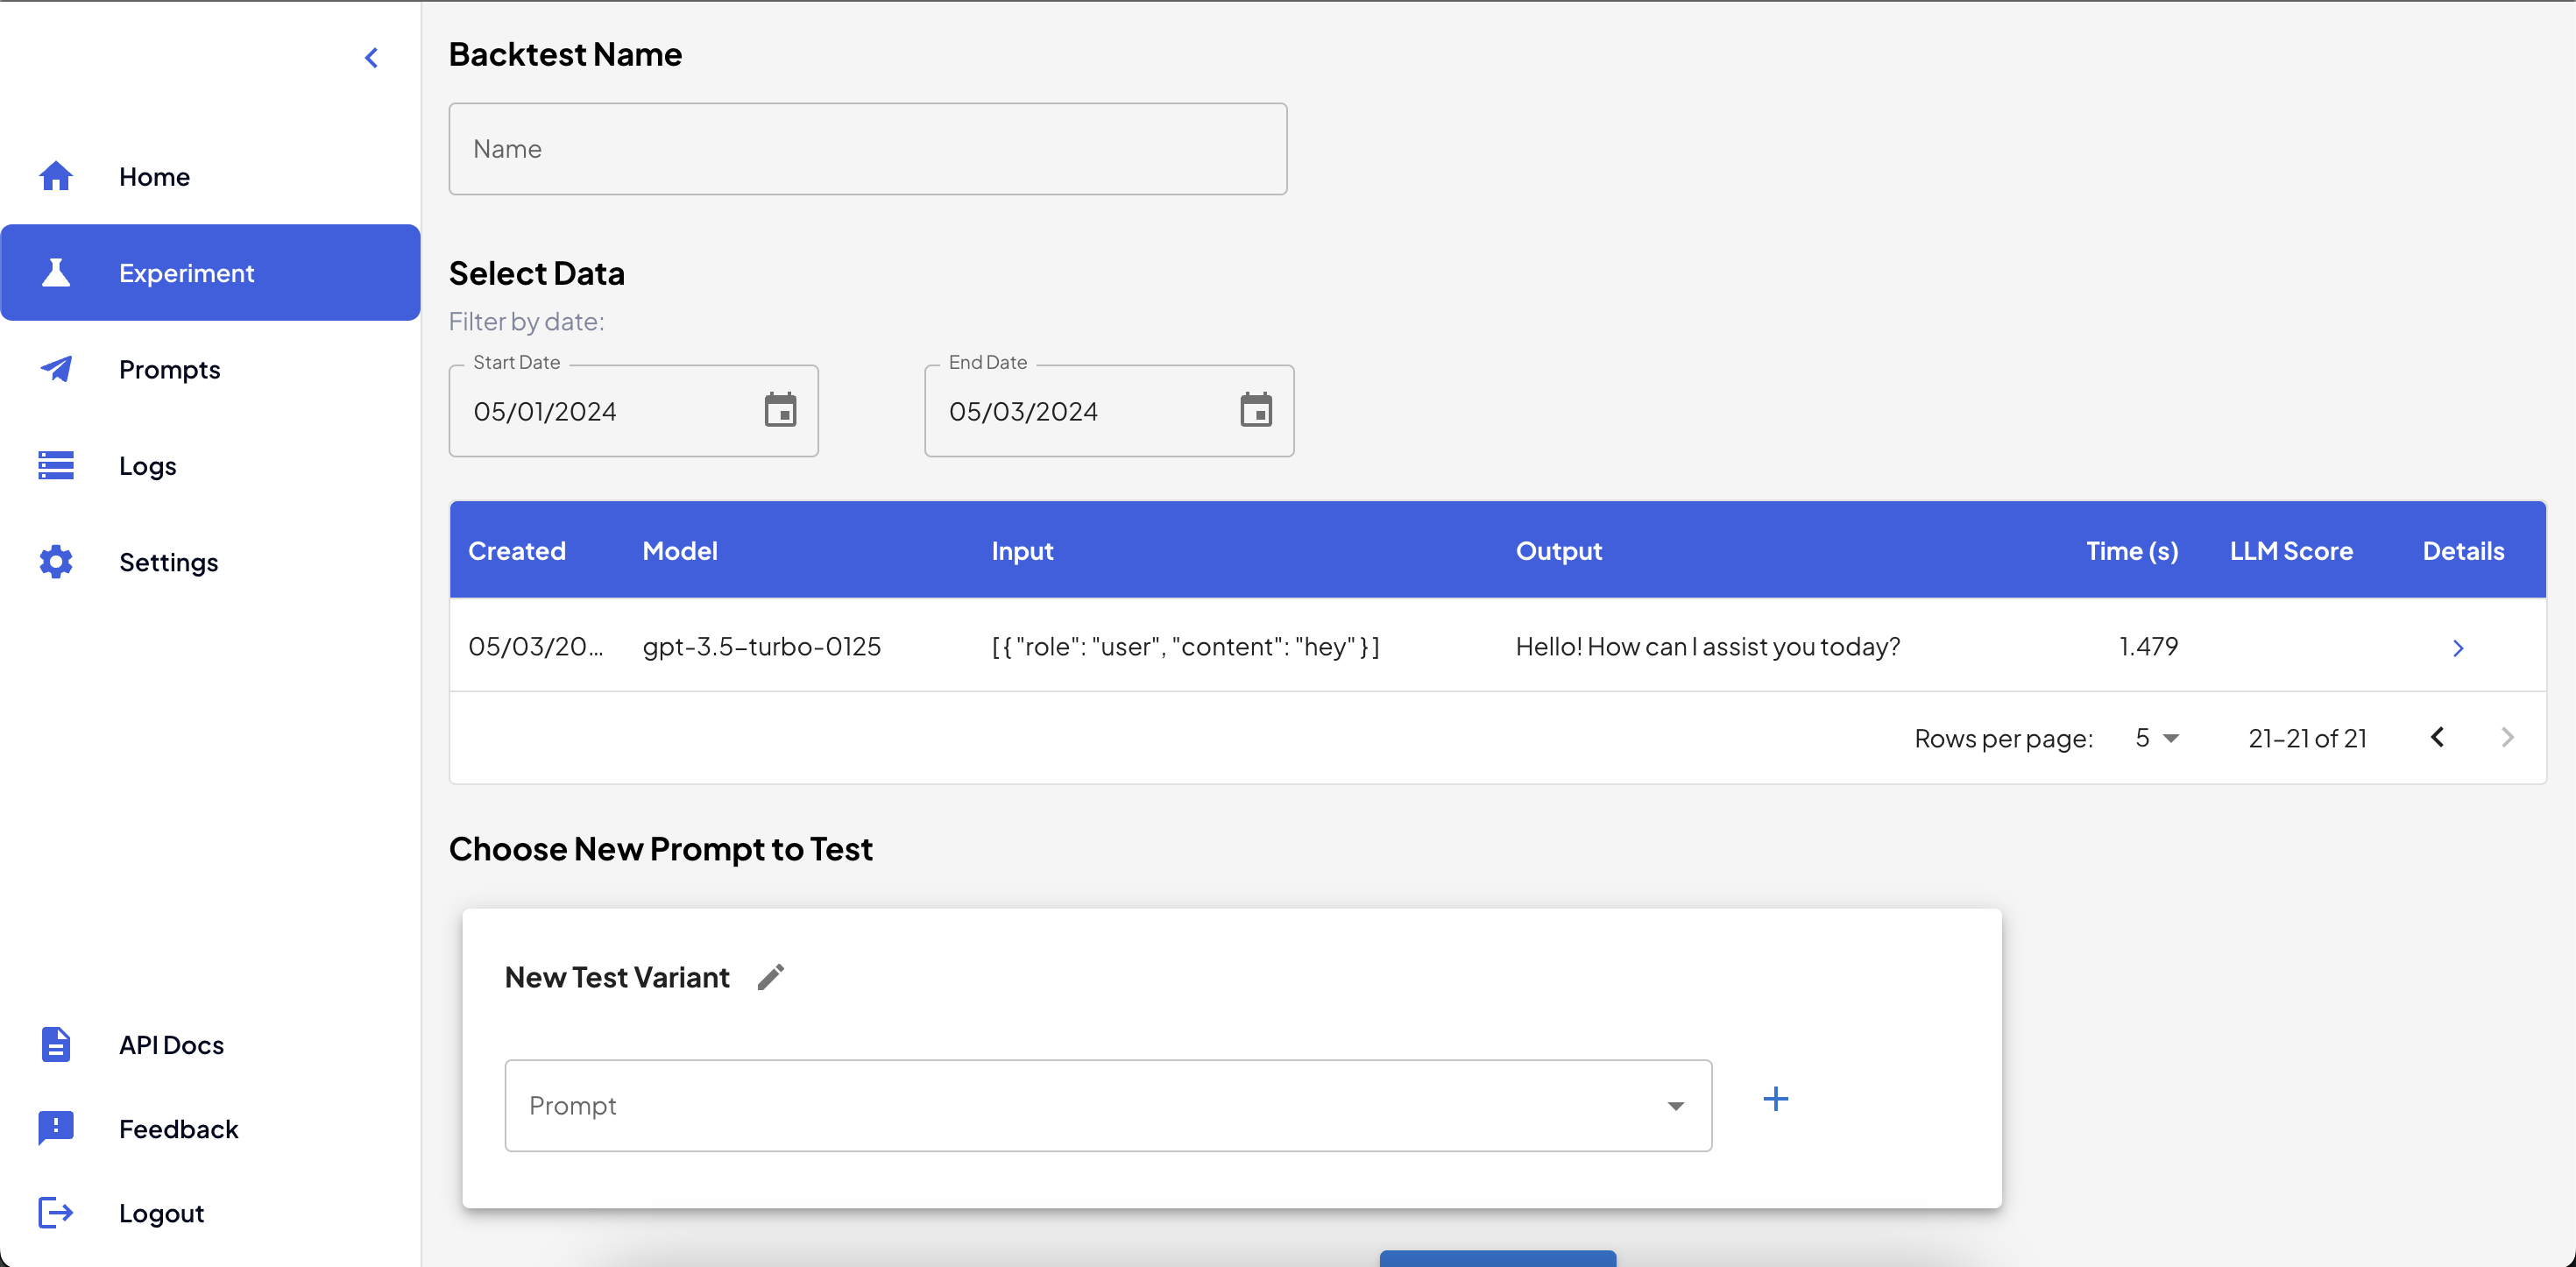
Set Up a New Backtest
Analyze your Backtest
From the Experiments page, find the Backtest you want to analyze and click on the “Details” arrow for that row. You can now view comparison graphs on the difference in time (latency) and the score for your requests before (“Old”) and after (“New”) the change. You can also view a comparison of the outputs and more details per log in the table below. More customizable graphs coming soon!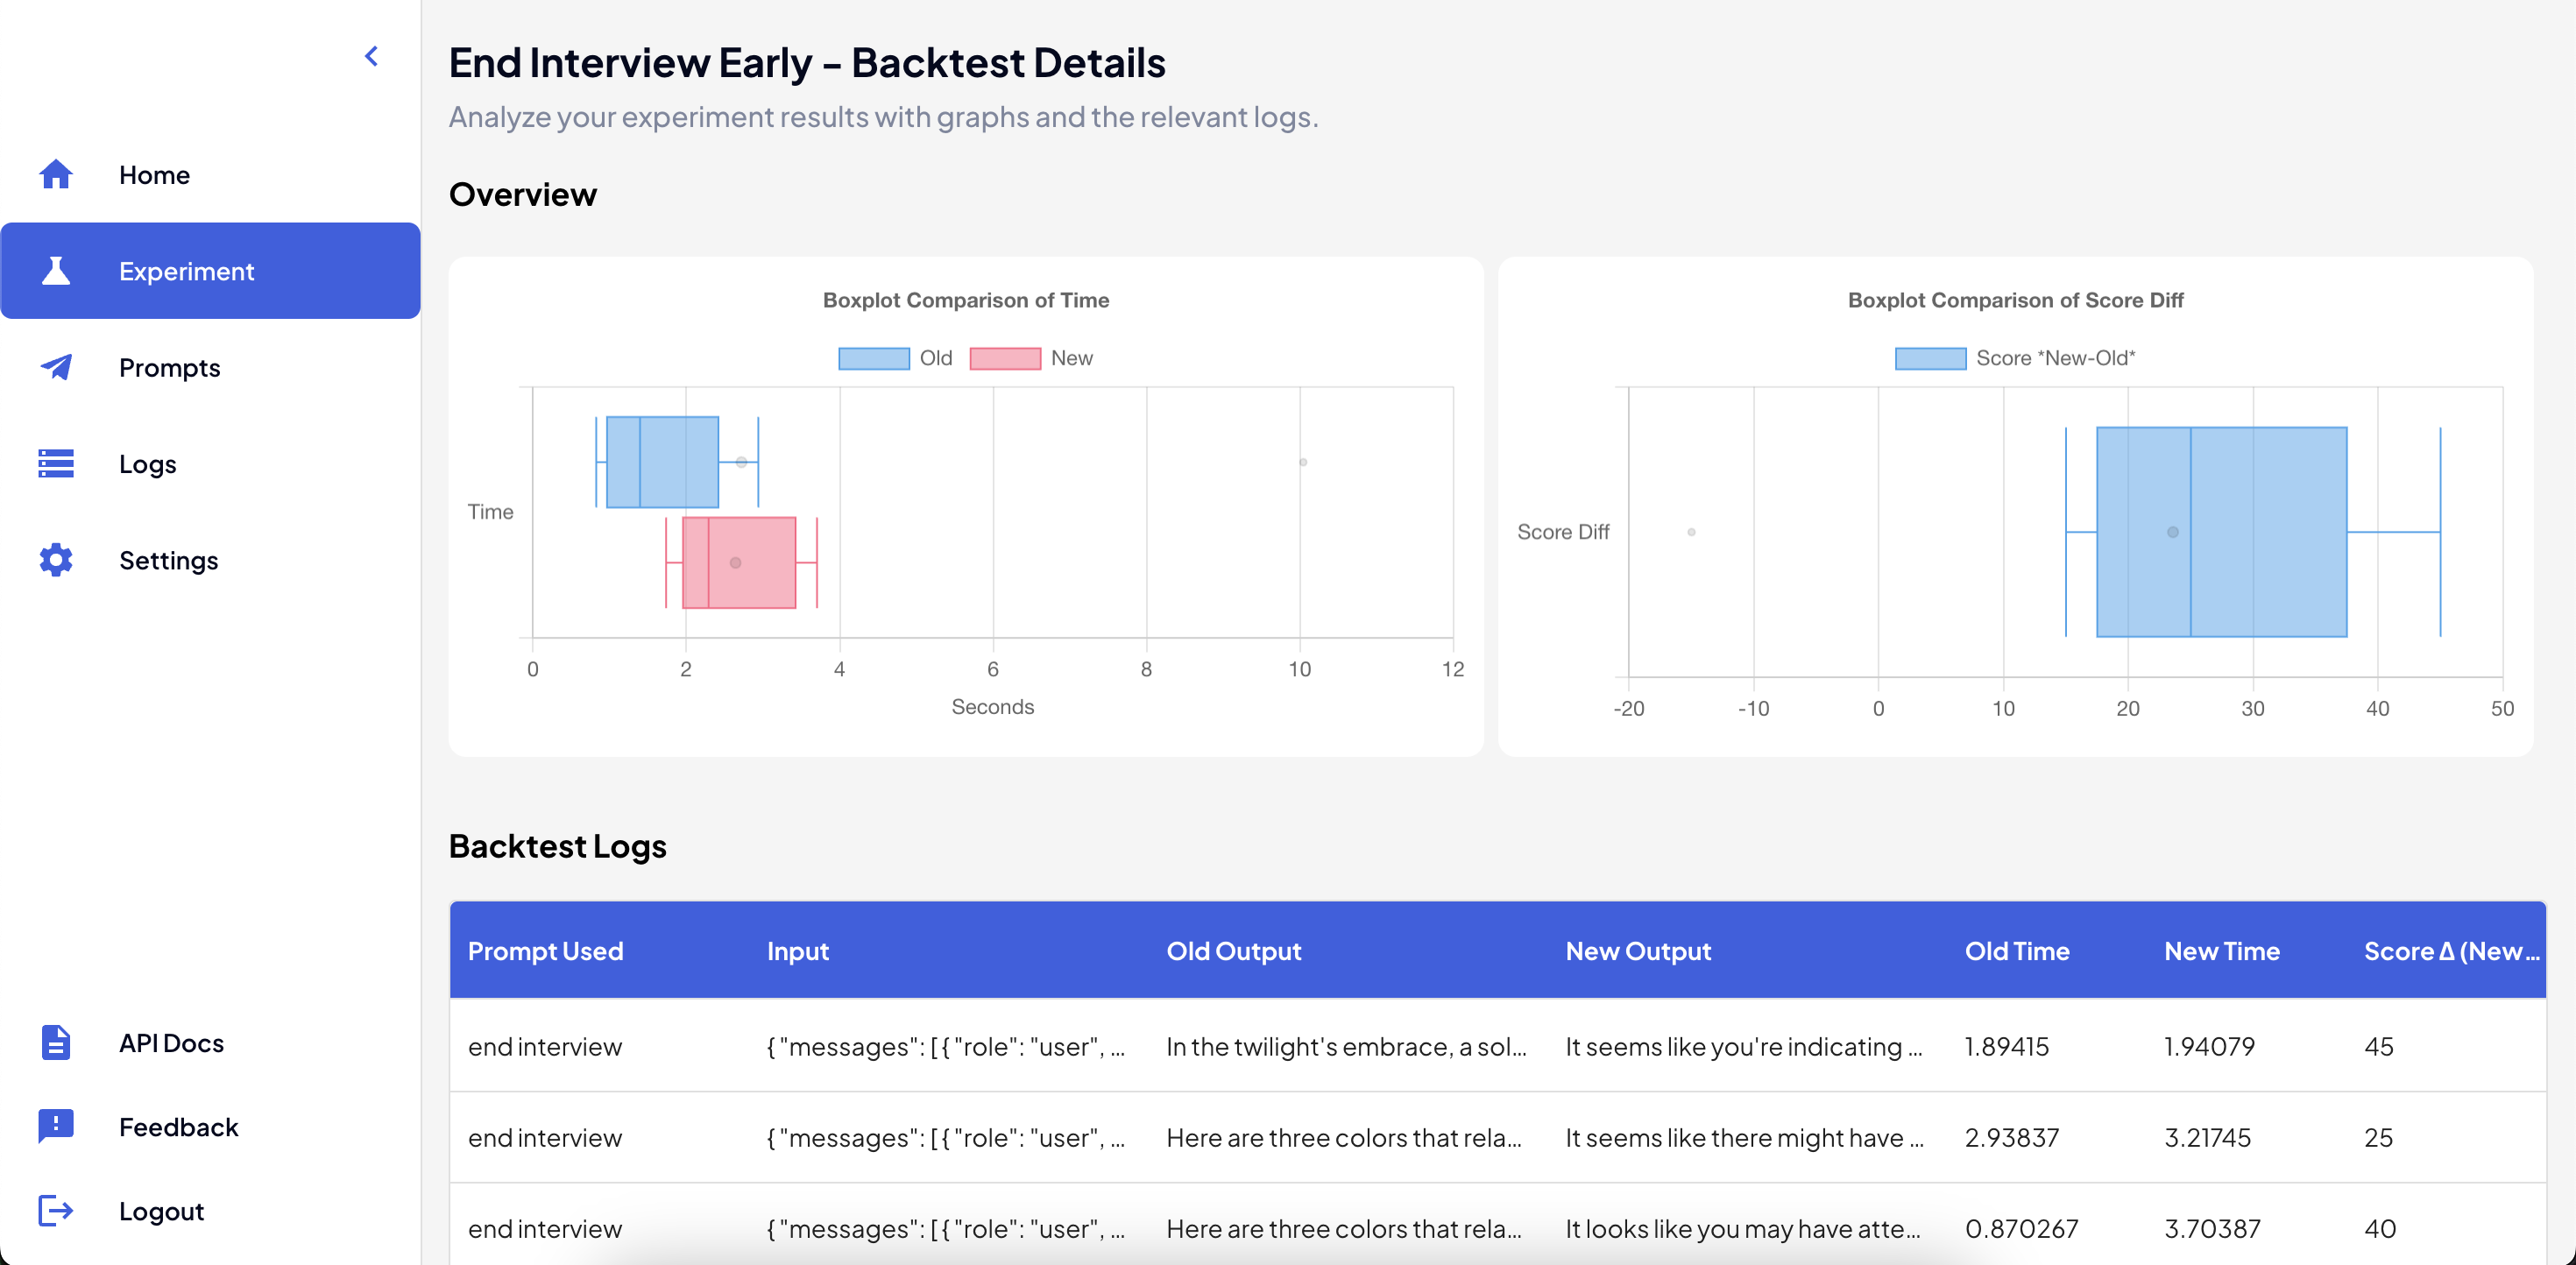
Backtest Details Page
A/B Tests
Create a new A/B Test
Get started by heading to the Experiments page, and clicking on the “New A/B Test” button. On the A/B Test creation page:- Name your A/B test. This is for your future reference.
- Select a date range. Choose the date range for your experiment to run. After the end date, it will be automatically completed and stopped. You can also always stop the experiment from the dashboard.
- Select the control prompt. Decide which prompt configuration will be the control for the experiment. This is usually your current prompt in use.
- Choose the variants to test. For each variant, your prompt/model configurations will be shown in the dropdown list.
Select one, or create a new prompt using the
+button next to the list. You can select as many variants as you need. - Hit the “Save Experiment” button, and sit back and watch the data roll in!
The experiment will be enabled for any request with the
prompt_idmatching the “Control” prompt.
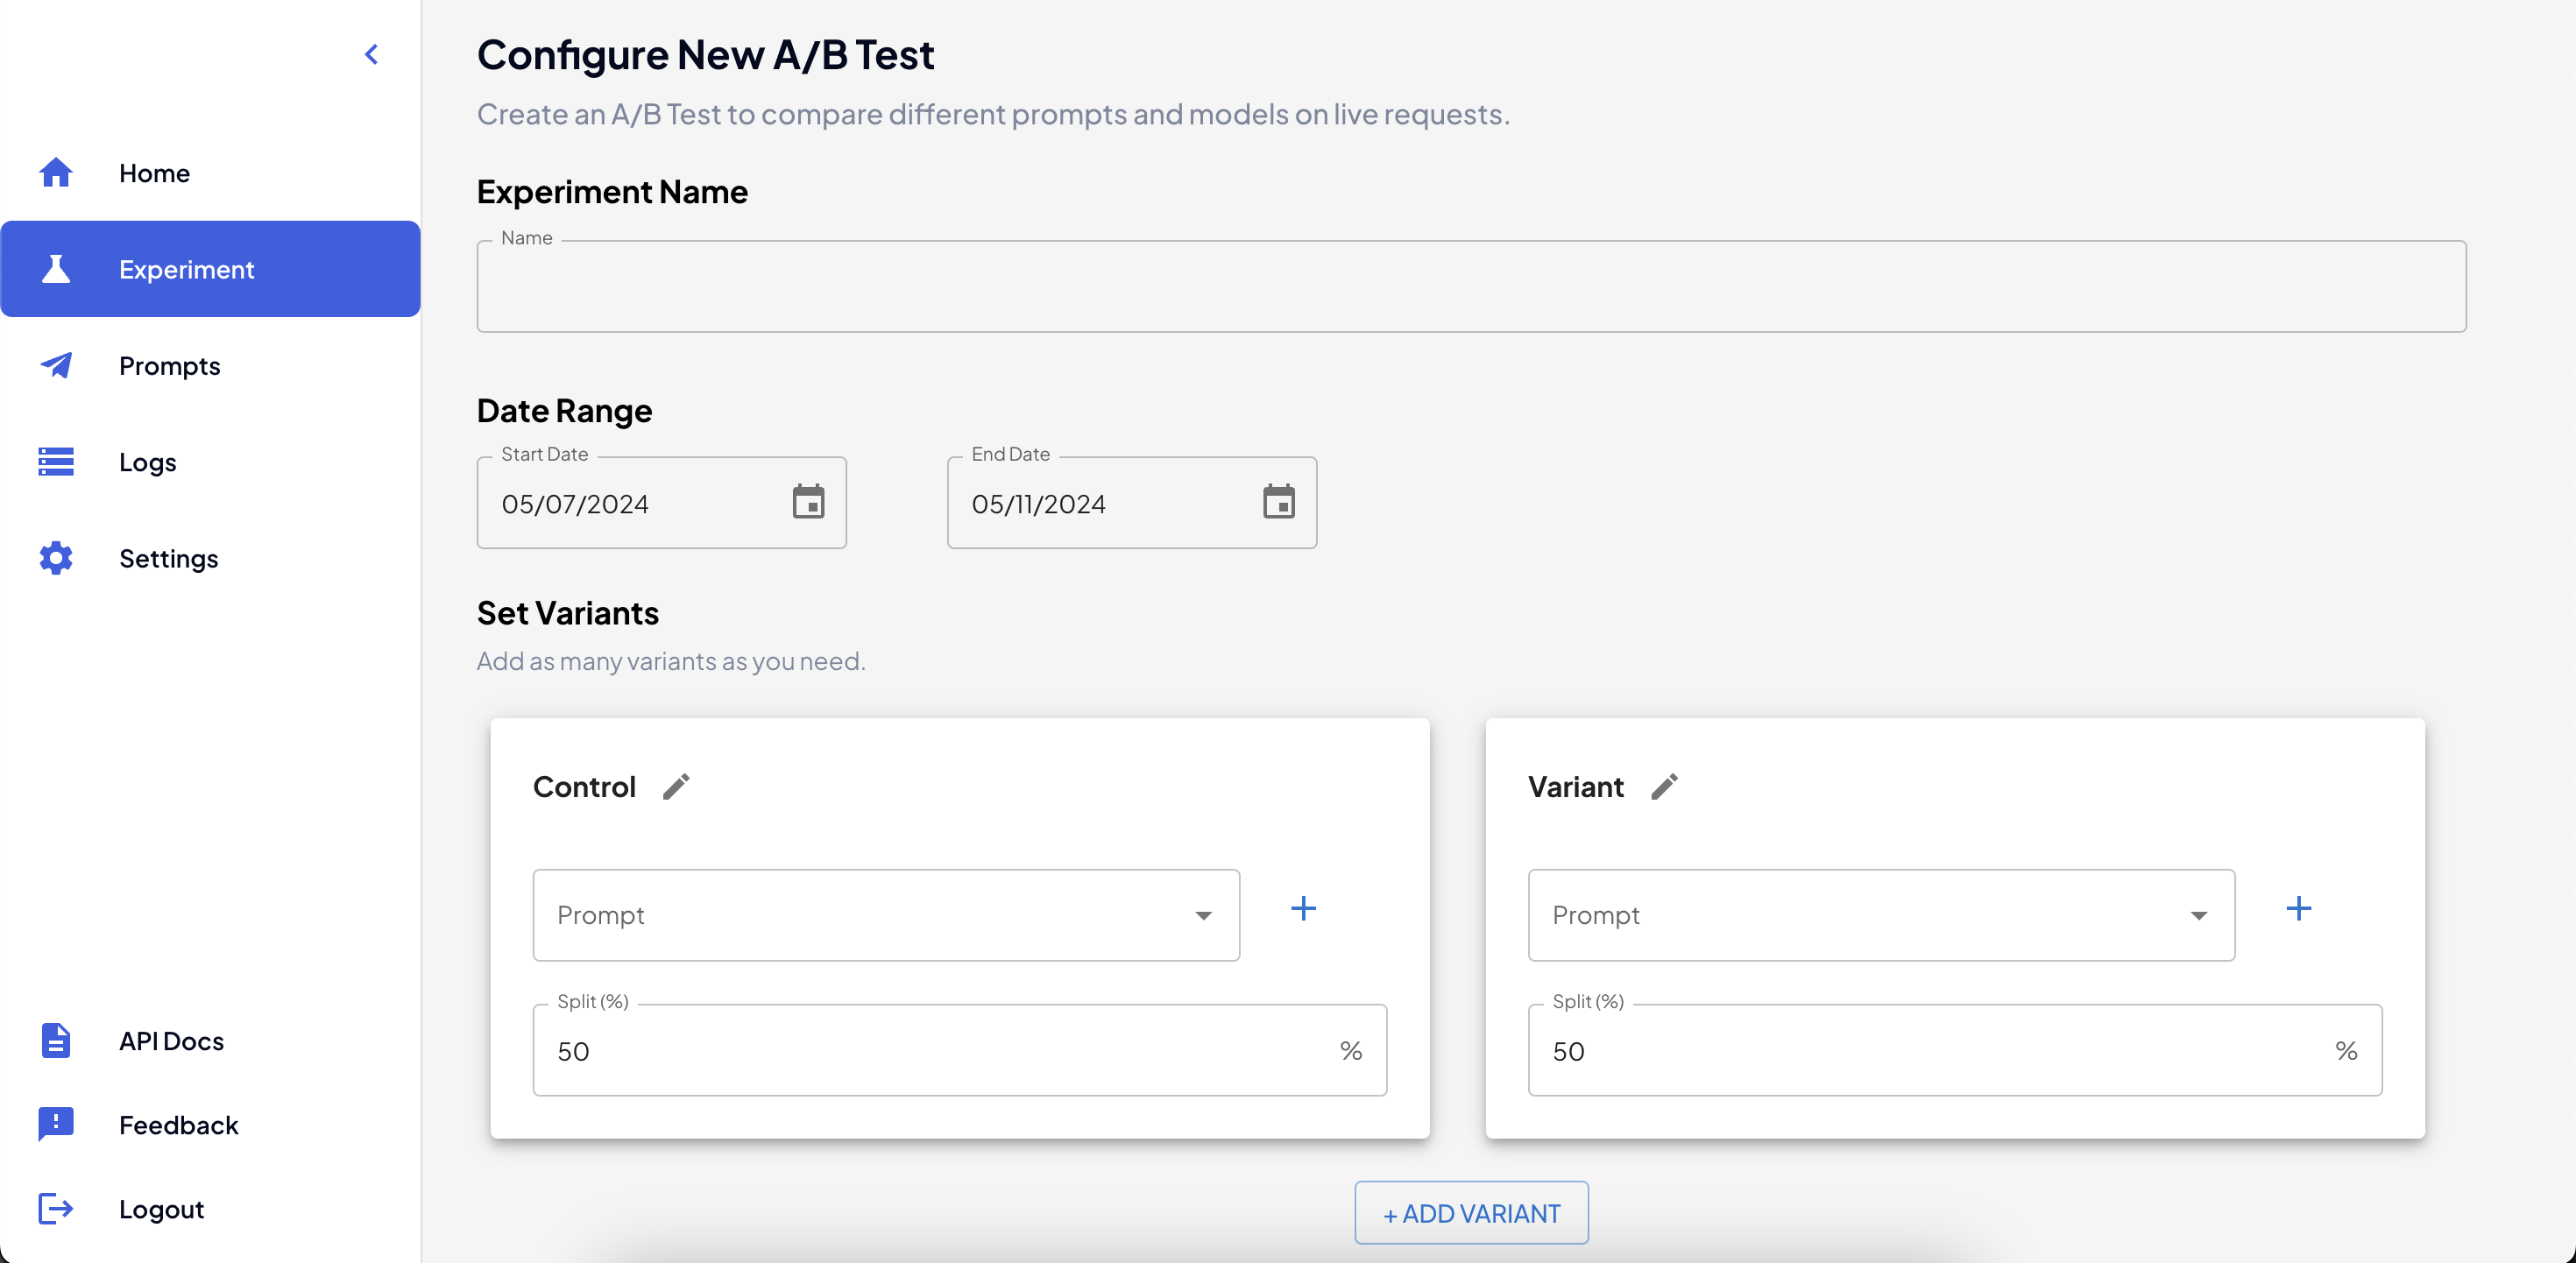
Set up a new A/B Test
Analyze your A/B Test
From the Experiments page, find the A/B Test you want to analyze and click on the “Details” arrow for that row. You can now view comparison graphs on the difference in time (latency) and the LLM-generated score for any requests run through the A/B test. You can also view all requests that the A/B Test has been enabled for in the table below, as well as the prompt and variant used for each. If you need to stop an active A/B test, you can also do it from this page with the “Stop” button in the top right.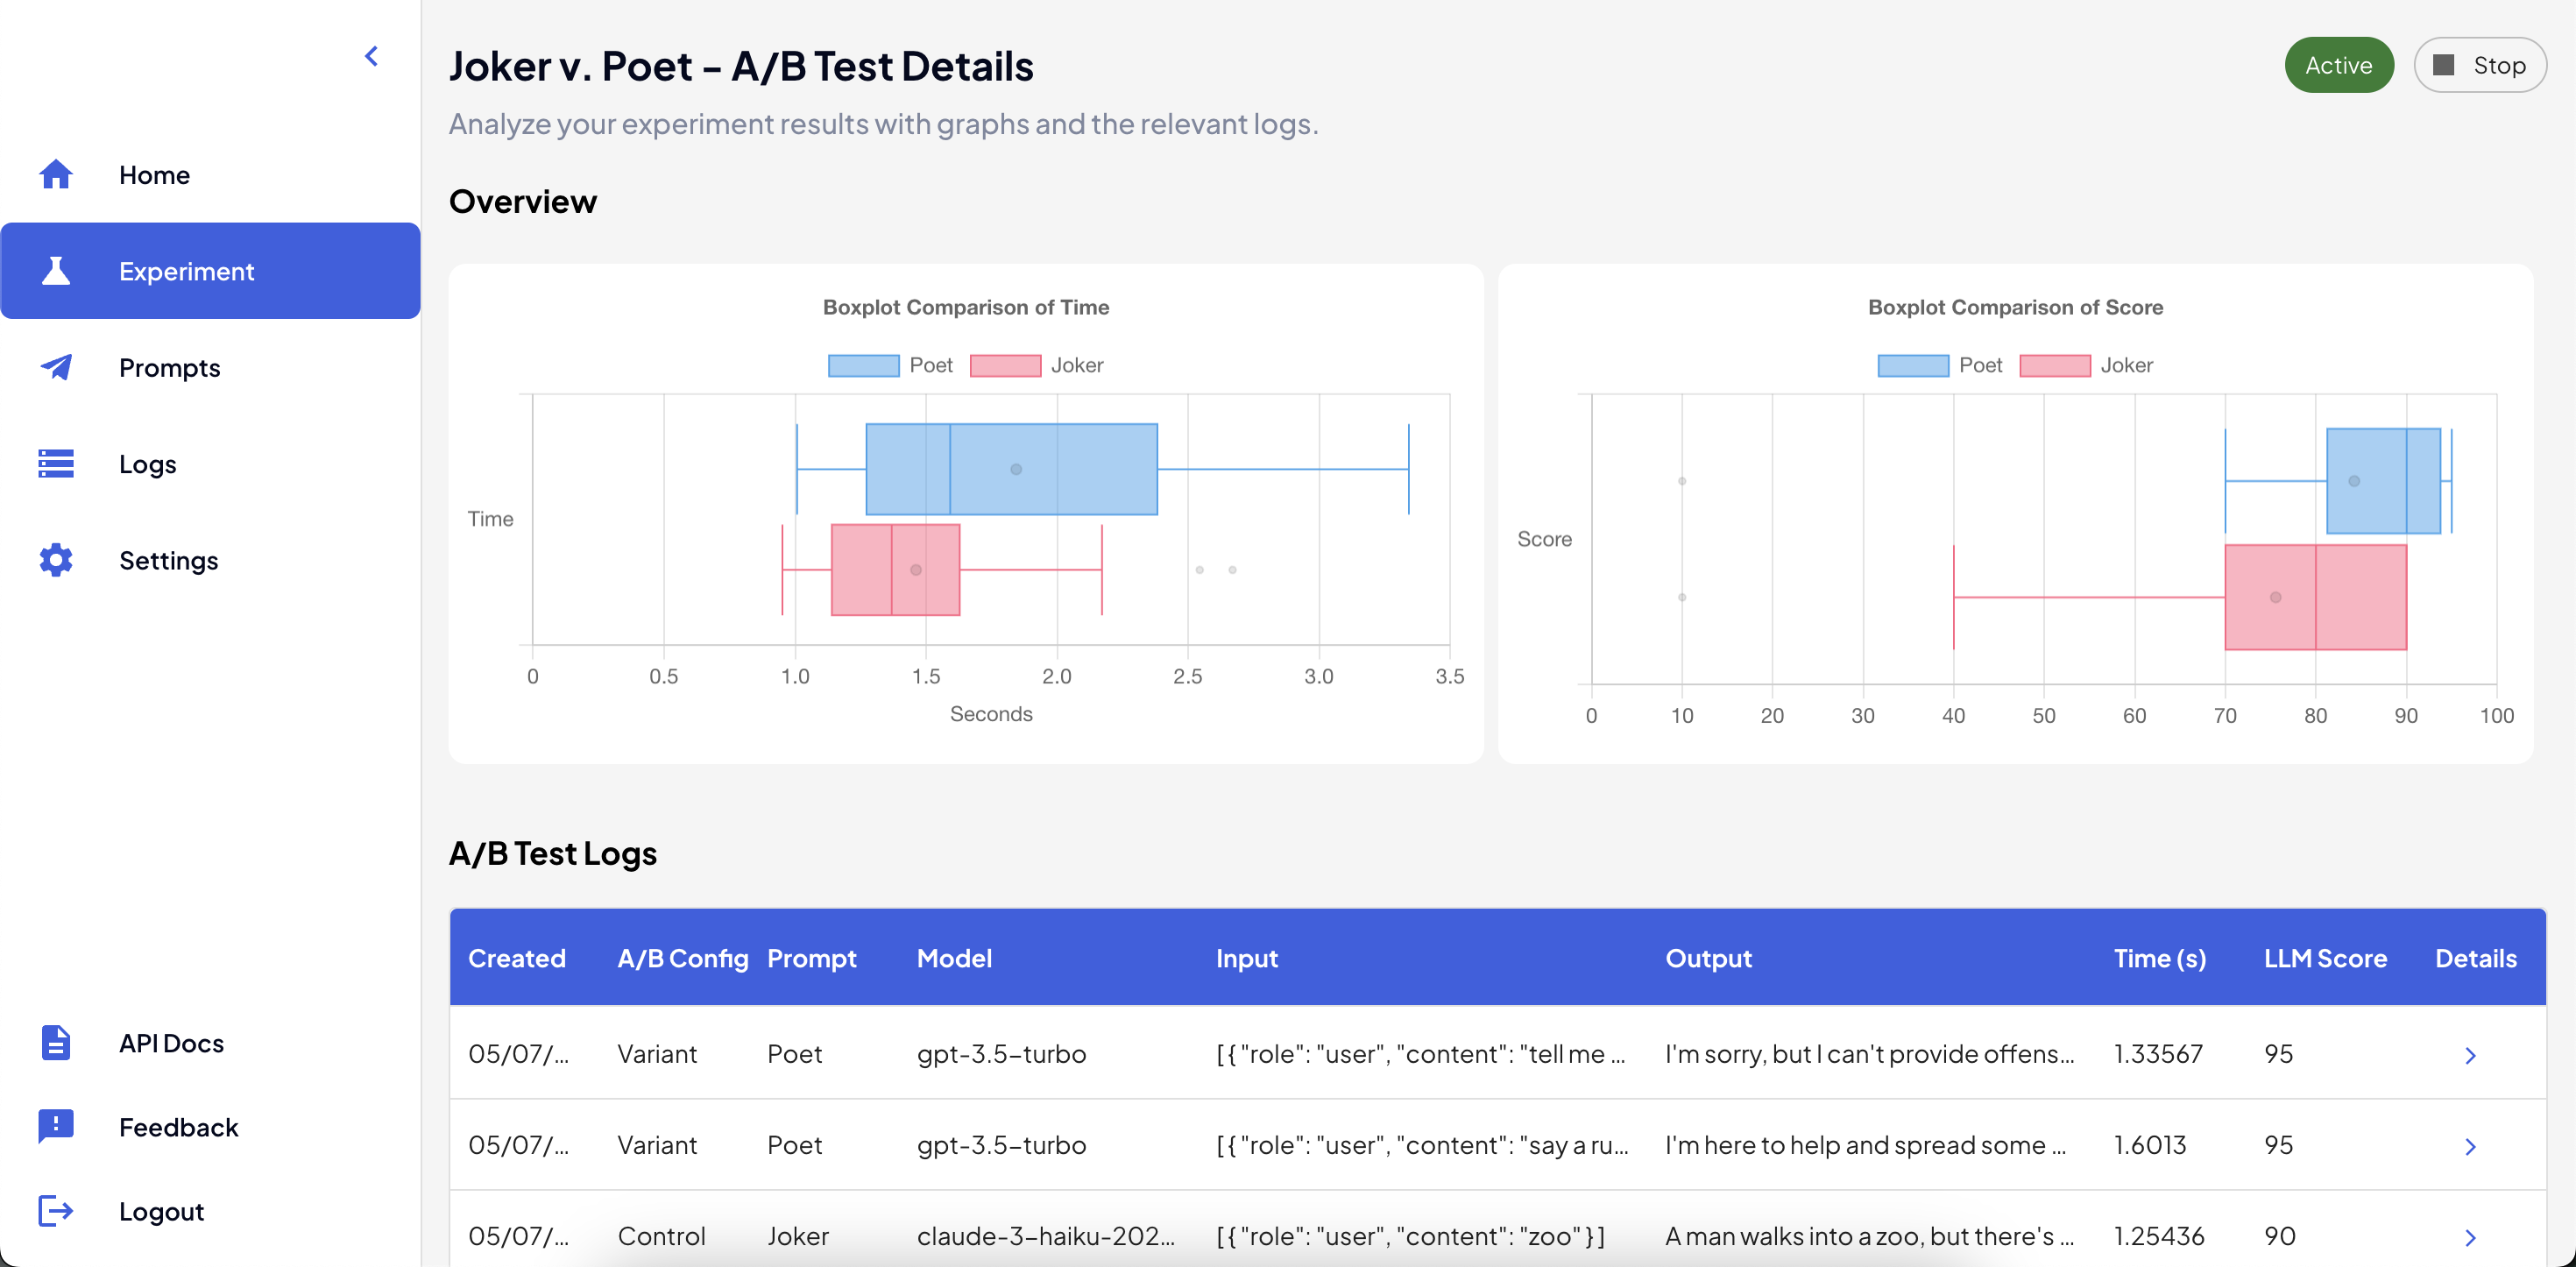
A/B Test Details Page